How To Re-Season & Strip Your Blackstone Griddle ? ( 8 Quick Steps )
Our Blackstone Griddle is made of metal and usually used outside, so you need to pay attention to take some care and upkeep to keep it from rusting and flaking. The more you cook, the more seasoning you have to do for your Blackstone Griddle.
So we’ve gone through some steps to help you clearly master the art of how to strip and reseason the griddle. That will restore your Blackstone to its non-stick, shiny glory, making every cookout as enjoyable as the first.
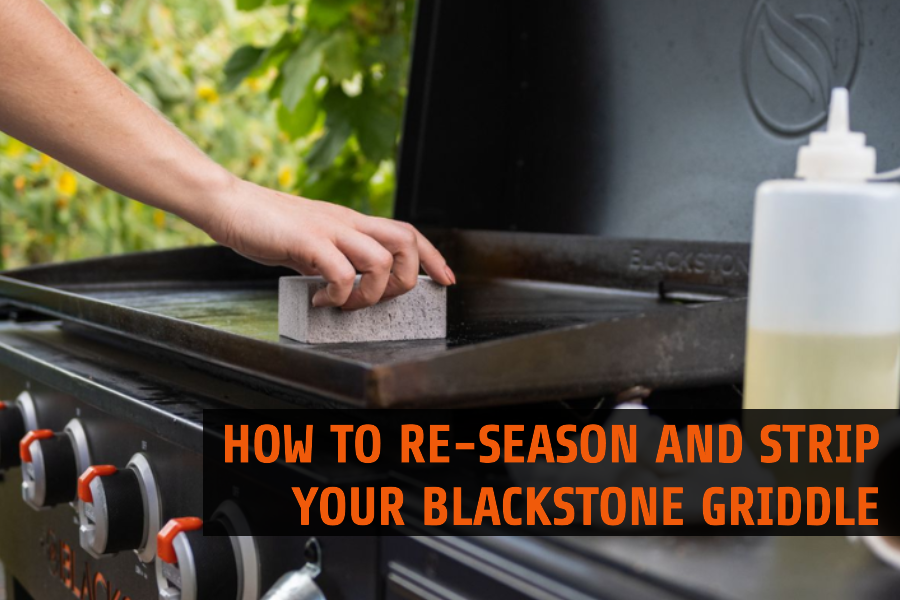
Table of Contents
show
WHY SHOULD YOU STRIP AND RE-SEASON A BLACKSTONE GRIDDLE ?
If you notice your Blackstone griddle looking a bit tired and flecked, that’s a sign it’s time to strip and re-season it. Here’s why giving your Blackstone griddle a is worth the effort:
Over time, the surface of your griddle might start looking uneven and discolored. This doesn’t just affect its look; it also impacts how well it cooks your food. Stripping and re-seasoning can bring back that even, clean look, making your griddle look as good as new.

Your griddle is always facing high heat and all sorts of weather conditions. But without regular seasoning, it’s vulnerable to rust. Seasoning creates a barrier that resists water, protecting your griddle from rust and decay. It’s like giving your griddle a waterproof coat!
Re-seasoning creates a smooth, glass-like surface that’s non-stick. We all love that perfect flip of a pancake or an egg sliding off the griddle with ease. This means less cooking oil and easier food release – making your cooking experience a breeze.
A well-seasoned griddle means you won’t be battling with stubborn food leftover. It prevents buildup, so you spend less time scrubbing and more time enjoying your meals. A smoother surface means a simple wipe-down often does the trick.
Did you know that cooking on a poorly maintained griddle could affect your food’s quality? Stripping and re-seasoning prevent iron or other compounds from leaching into your food, especially when cooking acidic ingredients. It’s not just about taste; it’s about keeping your meals healthy and safe.
Remember, a well-cared-for Blackstone griddle is the secret to delicious meals and hassle-free cooking. So, don’t overlook the importance of stripping and re-seasoning – your griddle.
WHEN SHOULD YOU STRIP AND RE-SEASON A BLACKSTONE GRIDDLE?
So when the right time is to strip and re-season your Blackstone Griddle? Here are a few signs that it’s time to give your griddle some love:
When you cooked something sour or sweet: Acidic foods like tomatoes, vinegar, or citrus fruits. Sugary food can be tough on your griddle’s seasoning: glazed meats, fruit and sweet sauces . They tend to break down the oil layers more quickly. So, after a big barbecue featuring these kinds of foods, consider giving your griddle a fresh coat of seasoning.
When foods start sticking: A well-seasoned griddle should be non-stick. If your pancakes are sticking instead of sliding off smoothly, it’s a clear signal to re-season.
After about 10-15 cooking sessions, it’s a good idea to re-season your griddle. This doesn’t have to be a full strip-down every time; sometimes, a light re-seasoning is all it takes to keep things cooking perfectly.
Remember, keeping it well-seasoned means better tasting food and a more enjoyable cooking experience. So, keep an eye on these signs, and your griddle will be a trusty companion for all your outdoor feasts!
HOW TO STRIP AND RE-SEASON YOUR BLACKSTONE GRIDDLE: A STEP-BY-STEP GUIDE
What you’ll need to strip and re-season Blackstone Griddle ?
It’s essential for you to choose the right tools and materials. Here’s my go-to list from personal experience – it’s like a little toolkit for griddle care!
- High Heat Seasoning Oil: You’ll want an oil that can stand up to the heat without smoking too soon. I’ve found that avocado oil and Crisco are perfect for this. They have high smoke points and create a great non-stick layer without burning off too quickly.
- Durable Paper Towels: Ordinary kitchen towels just don’t cut it – they fall apart as soon as they touch oil. I use blue mechanic’s or shop-style paper towels. They’re super tough and won’t break apart, even when soaked in oil. Trust me, they make applying the oil so much easier and less messy.
- Squirt Bottle: A simple squirt bottle gives you so much control over the amount of oil you’re using. No more pouring oil directly from the bottle and ending up with too much. It’s all about that perfect thin layer, and this tool helps you achieve it.
- Sandpaper or a Grill Brick: If your griddle is new or in rough shape, you’ll need something a bit abrasive to start with. I use either sandpaper or a grill brick to smooth out the surface. It’s like giving your griddle a clean slate to work with.
- Long-Handled Tongs: When spreading oil on a hot griddle, you want to keep your hands at a safe distance. Long-handled tongs are your best friend here. Just grip a wad of those sturdy paper towels with the tongs, and you can oil the griddle safely and evenly.
A Step-by-Step Guide to Stripping and Re-Seasoning:
Step 1: First things first, let’s strip that old seasoning. Use a grill brick or sandpaper gently. It’s like gently buffing out the imperfections on a cherished piece of furniture. The aim is to get a smooth, clean surface.
Step 2: Next up, let’s clean it. If it’s brand new or the old seasoning is flaking, I find that hot soapy water works wonders. Rinse thoroughly afterward and pat it dry. Think of this as setting the stage for your griddle’s transformation.
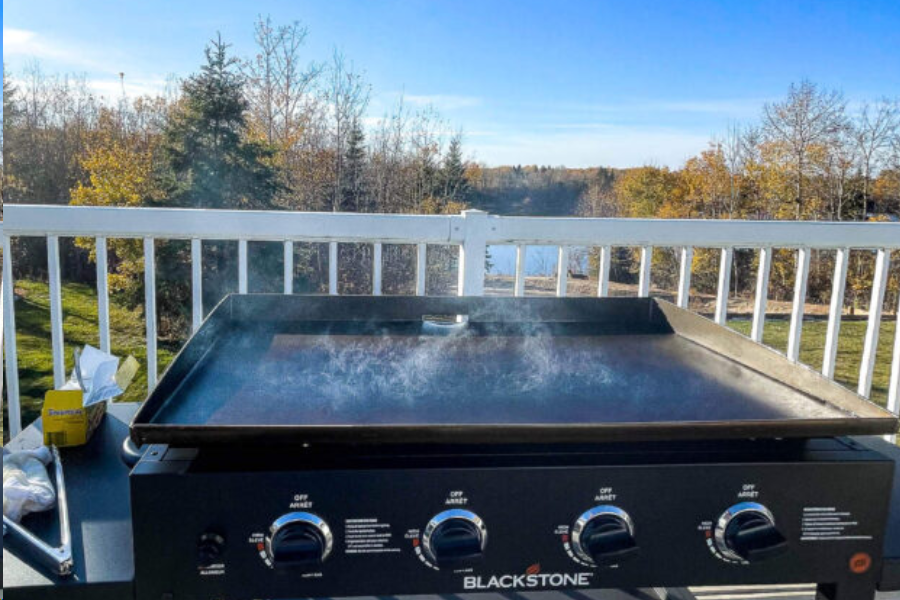
Step 3: Now, let’s warm up your griddle. Set it to a low heat for about 10-15 minutes. This step is important – It preps the griddle for the oil and ensures an even seasoning.
Step 4: It’s oil time! I swear by Crisco, but you can choose any high-smoke-point oil. Apply a thin, even layer using paper towels. Be careful – the griddle will be hot so apply it not too thick, not too thin.
Step 5: The oil will start smoking, bonding with the metal. Let it smoke for about 5-10 minutes. It’s like watching the griddle shed its old skin and get ready for a new one.
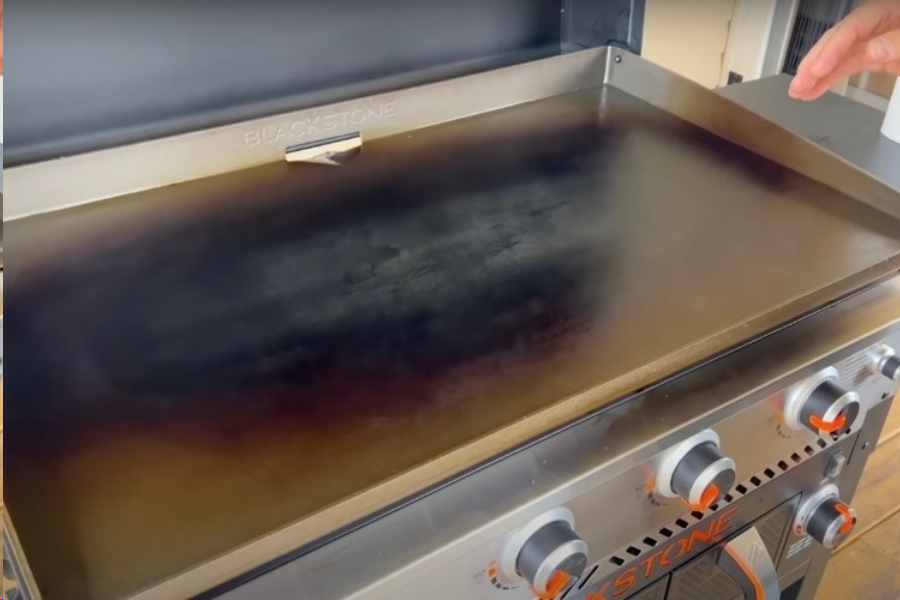
Step 6: For a spanking new or fully stripped griddle, don’t stop at one layer. I usually go for a few rounds of oiling and smoking. Each layer adds more armor to your griddle. Watch as the color deepens – it’s quite satisfying.
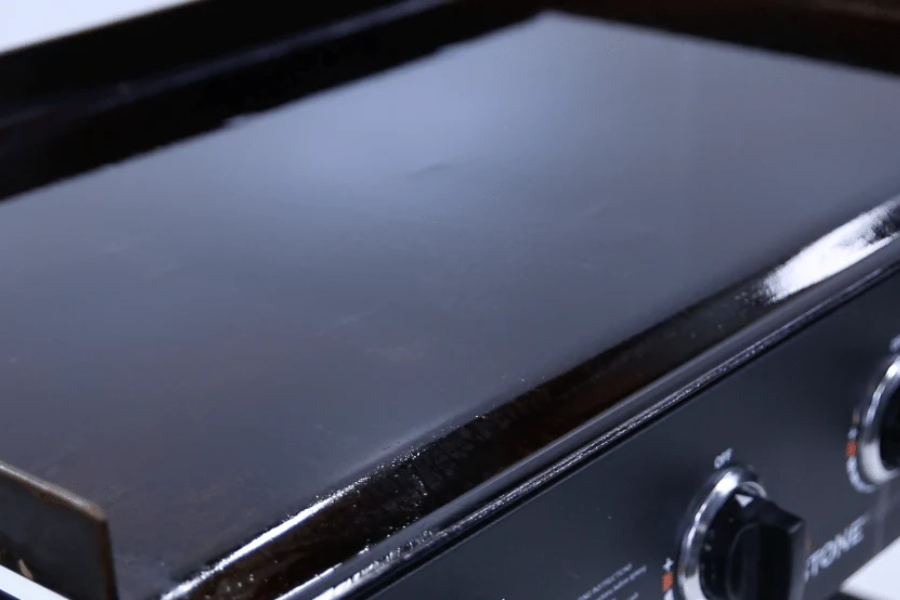
Step 7: After you’re satisfied, and while it’s still warm, brush on one final layer of oil. This acts like a sealant, keeping your griddle safe until its next use.
Step 8: Post-cooking care is crucial. A quick clean with water, dry it off, and a thin layer of oil keeps your griddle in tip-top shape. It’s like tucking it in after a long day’s work.
WRAPPING IT UP ON STRIP AND RE-SEASON BLACKSTONE GRIDDLE
In summary, maintaining your Blackstone Griddle is an essential part of the outdoor cooking experience. Regular stripping and re-seasoning ensure your griddle remains non-stick, rust-free, and ready for whatever culinary adventures await.
So, whether you’re flipping burgers, searing steaks, or cooking up a family breakfast, your Blackstone Griddle will ready to deliver those perfect, mouth-watering results every time.